This blog details a hindrance with the Rigol DP832 power supply outputs when used for purposes such as characterising digital inputs, circuit reaction times or external power supply transient performance to name handful.
DP832 'Gotcha'
The Rigol DP832 is a good mid-range power supply sporting an easy to use interface to suit the hobbyist and options such as remote communications and power cycling to cater for some professional applications. For engineers familiar with power supply interruption testing, as defined in EN61496-1, the Rigol DP832 can be setup, with some fiddling, to assist with compliance tests.
It was the power cycling feature on the DP832 that was to be used for testing the PLC input design, however after the first few power cycles some unexpected measurements were observed. The configurable PLC input section circuit is shown below.
The power On captures shown below illustrate the difference between using the Rigol On/Off power button and the second capture shown the response using an external switch with the Rigol power button set to On.
The delay in powering the circuit Off was also easily visible on the scope.
Output Capacitance
Looking at the captures from the scope this appeared to be output capacitance. I recalled that Dave Jones from EEVBlog had torn down the DP832 several years ago; the output capacitors where found in EEVBlog #511; credit and many thanks to Dave Jones saving me the teardown.
The output capacitors appeared to be 1000uF electrolytics, which would explain the delayed switching performance.
Output Solution
As a temporary solution to testing, a relay was added. Channel one performed the relay coil switching and Channel two was left powered with the output connected to a Normally Open relay contact. The switching response was did not have the effect of the capacitor charge time although some relay contact bounce was evident.
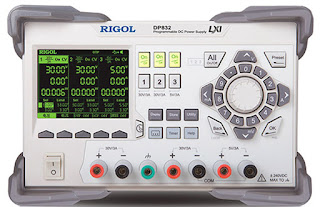 |
| Rigol DP832 |
The Rigol DP832 is a good mid-range power supply sporting an easy to use interface to suit the hobbyist and options such as remote communications and power cycling to cater for some professional applications. For engineers familiar with power supply interruption testing, as defined in EN61496-1, the Rigol DP832 can be setup, with some fiddling, to assist with compliance tests.
It was the power cycling feature on the DP832 that was to be used for testing the PLC input design, however after the first few power cycles some unexpected measurements were observed. The configurable PLC input section circuit is shown below.
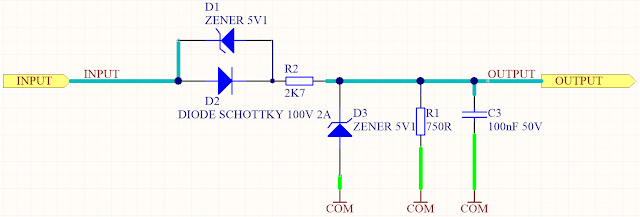 |
| PLC Input Section |
 |
| Power ON Delay using Rigol Power Button |
 |
| Power ON Delay using External Switch - Rigol Power ON |
The delay in powering the circuit Off was also easily visible on the scope.
 |
| Power OFF Delay using Rigol Power Button |
 |
| Power OFF Delay using External Switch - Rigol Power ON |
Output Capacitance
Looking at the captures from the scope this appeared to be output capacitance. I recalled that Dave Jones from EEVBlog had torn down the DP832 several years ago; the output capacitors where found in EEVBlog #511; credit and many thanks to Dave Jones saving me the teardown.
The output capacitors appeared to be 1000uF electrolytics, which would explain the delayed switching performance.
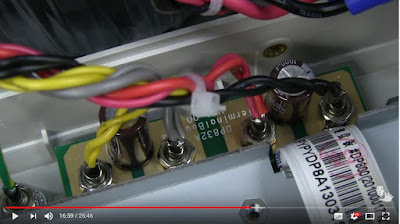 |
| EEVBlog #511 DP832 Output Capacitors - 2 Channels |
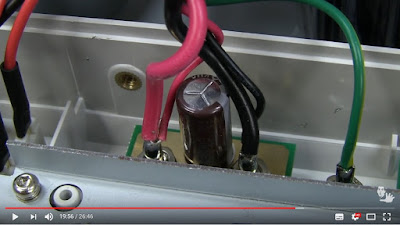 |
| EEVBlog #511 DP832 Output Capacitors - 1 Channel |
Output Solution
As a temporary solution to testing, a relay was added. Channel one performed the relay coil switching and Channel two was left powered with the output connected to a Normally Open relay contact. The switching response was did not have the effect of the capacitor charge time although some relay contact bounce was evident.

