Although the early EPSolar MPPT Tracer series with remote display have been surpassed by improved MPPT models with inbuilt LCDs, there are plenty of the earlier models that remain in operation. This project is Cypress PSoC 4 BLE based and features connection to the Tracer MPPT, load control, Bluetooth and data logging of the MPPT data.
MPPT
A number of other people have used the EPSolar MT-5 display to reverse engineer the communications protocol, however there was PC software from the same manufacturer which performed all the same functions, possibly more.
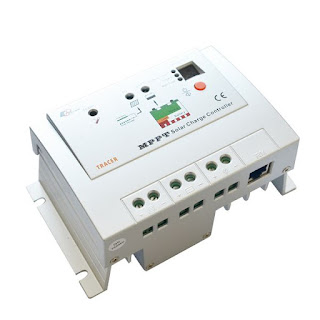 |
| EPSolar Tracer RN MPPT |
Hardware
Initial documentation for the MPPT connections were taken from a site by Steve Pomeroy, another two sites by John Geek. The 8 way RJ connections to the Tracer were drafted with an optional zero ohm link added such that the MPPT could power the project. Buffers were added to the transmit and receive lines, although not a necessity, to ensure some protection for the PSoC from the real world.
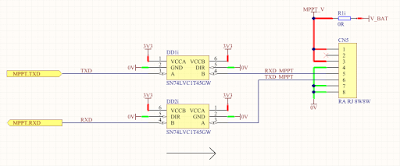 |
| EPSolar Tracer RJ45 Connections |
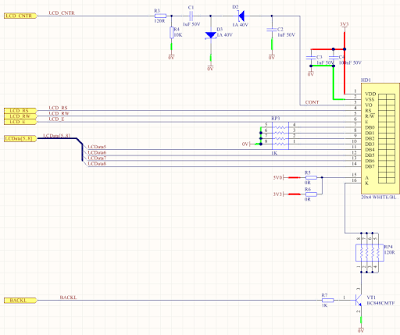
For the display an OLED or LCD capable of being powered from 3.3V for both the logic and backlight was selected. In most instances this results in the LCD contrast voltage being negative however this was generated by the PSoC using the circuit shown below.
Four momentary push buttons were used instead of the Cypress Capsense feature. This solution using switches was chosen only due to the design of the hardware as the PCB was to be mounted inside a box and away from the lid.
 |
| Buttons / User Interface Connections |
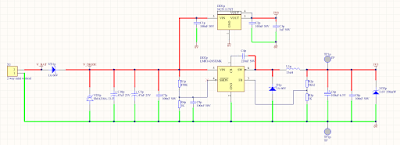 |
| Power Supply Connections |
Even though the design incorporated Bluetooth, USB was added for debugging, downloading of data and upgrading of the PSoC. Field upgrades would be possibly by using the PSoC bootloader, a program allowing the active application to be updated some time in the future. The FTDI FT230X was chosen for the USB implementation however for those looking for a similar priced and reliable solution the Cypress CY7C65213A-32 would also be a good choice.
 |
| FTDI USB Connections |
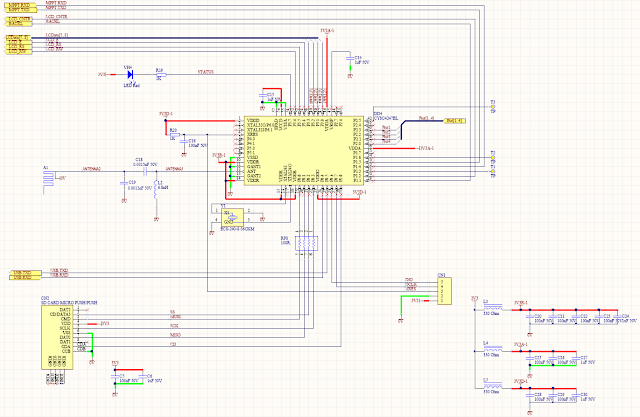 |
| PSoC Connections and Supply Filtering |
 |
| Project Top Sheet |
PCB Enclosure
The PCB was designed to fit into a plastic enclosure with a clear lid, no bells no whistles. A Ritec case from a local supplier was used, the Altronics H0324.
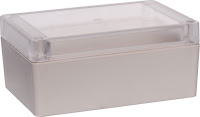 |
| Altronics H0324 enclosure |
With the enclosure size selected the PCB dimensions were set to 98mm (W) x 75mm (H).
PCB Design
For the schematic and board design Altium was chosen since the board was mixed logic with RF. This combination was always in my mind a four layer board. The board layer stack would follow the usual two middle power planes and signals on the outside layers.
There were a number of parts added to the component database although none more interesting that the meandered inverted-F antenna (MIFA) to suit the PSoC4 BLE part. The antenna design was well documented in the Cypress Application Note - AN91455. This antenna was implemented as described on Page 10 of the Application Note.
There were a number of parts added to the component database although none more interesting that the meandered inverted-F antenna (MIFA) to suit the PSoC4 BLE part. The antenna design was well documented in the Cypress Application Note - AN91455. This antenna was implemented as described on Page 10 of the Application Note.
 |
| PSoC4 BLE MIFA |
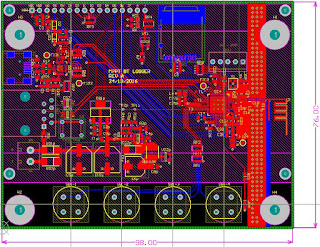
The board shape was drawn and a work guide added for the position of the four push buttons, then all components were place on the PCB.
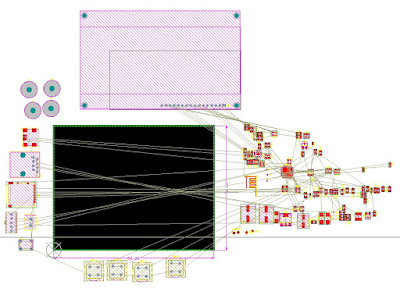 |
| Tracer MPPT Interface Board |
With some quick shuffling of parts then an idea of the layout could take place.
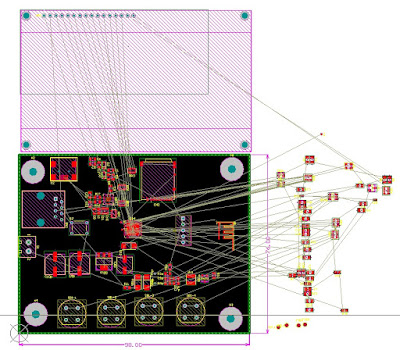 |
| Tracer MPPT Interface Board Parts Placement |
Parts positions were changed on the PCB with some connectors and the SD card moved to the bottom layer.
The PCB was hand populated for both top and bottom layer. Some last minute modifications were made to the LCD connector and backlight control because the four line LCD had to be changed to another manufacturer. LCD supply pins were swapped.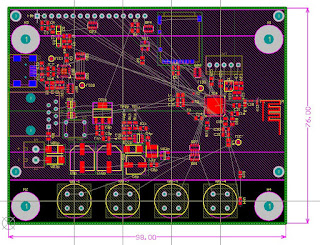 |
| Tracer MPPT Interface Board Final Part Placement |
| Top Layer MPPT PCB Populated |
| Bottom Layer MPPT PCB Populated |
USB Check
Two of the hardware connections that were used for debugging this particular project were the Cypress MiniProg3 programmer and the USB port. Certainly the LCD or on-board status LED could also be useful although the background debugger and serial port usually work sufficiently.
With the USB connected between the MPPT board and a Windows PC, the FDTI chip was configured using the FTDI application FT Prog. This application was used to disable three unused CBUS pins and reconfigure the fourth for USB bus voltage detection.
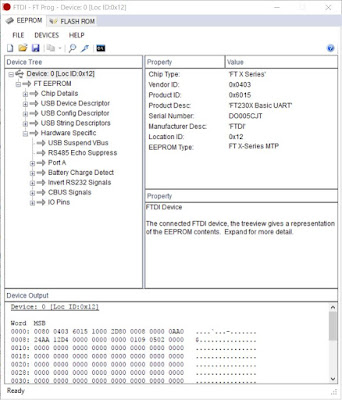 |
| FT Prog Scan |
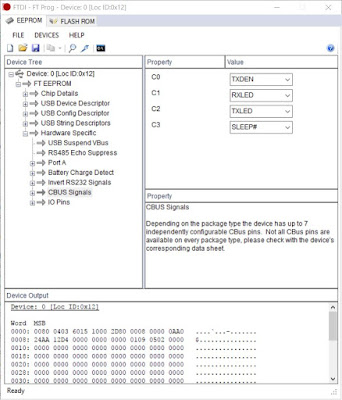 |
| FT Prog Default CBUS Settings |
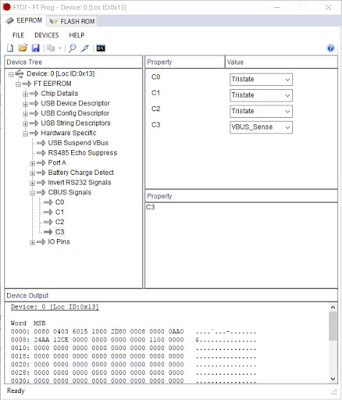 |
| FT Prog Updated CBUS Settings |
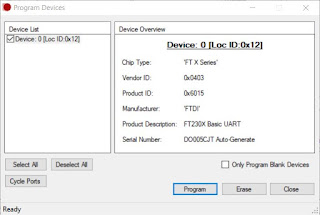 |
| FT Prog Program |
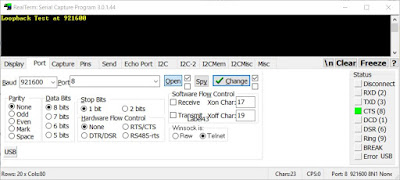 |
| RealTerm Loopback Test for MPPT Board |
Software - Prototype
After the initial hardware checks of the boards power rails some initialisation code was written to check the LCD, buttons and communications. Below is an example of the initialised LCD.
| Initialised LCD for Testing |
A prototype project, certainly with some bugs, is available for download below.
 |
| Prototype Tracer PSoC MPPT Interface |
Serial Data Logging
The data logging 'USB output' was rather raw code with the sole purpose of providing a console output capable of being imported into Microsoft Excel. The UART Update function was called every minute and send some basic information to a terminal application.
void UART_Update()
{
    char UART_Buf[20];
    uint16_t UART_temp;

    UART_UartPutString(LINE1_PV);
    UART_temp = MPPTPanelVoltage;                           /* Temp memory to modify for display */
    sprintf(UART_Buf, "%d.%02d%s%c", (UART_temp/100), (UART_temp%100),"V",0x9);
    UART_UartPutString(UART_Buf);
    UART_UartPutString(LINE1_BV);
    UART_temp = MPPTBatVoltage;                             /* Temp memory to modify for display */
    sprintf(UART_Buf, "%d.%02d%2s%c", (UART_temp/100), (UART_temp%100),"V ",0x9);
    UART_UartPutString(UART_Buf);
    UART_UartPutString(LINE2_BI);
    UART_temp = MPPTBatteryCurrent;                         /* Temp memory to modify for display */
    sprintf(UART_Buf, "%d.%02d%s%c", (UART_temp/100), (UART_temp%100),"A",0x9);
    UART_UartPutString(UART_Buf);
    if (System.MPPT_Load_Is_On == true)
    {
        UART_UartPutString(" Load On\r\n");
    }
    else if (System.MPPT_Load_Is_On == false)
    {
        UART_UartPutString(" Load Off\r\n");
}Shown below is an example of the data output to a terminal application.
 |
| MPPT Example UART Output |
The protocol was verified and confirmed in another of my blogs which can be found at http://electronicmethods.blogspot.com.au/2017/03/tracer-mt-5-to-mppt-communications.html
SD Card
The SD card implementation was scheduled to use the Element 14 community project #50 implementation for the PSoC4, which uses a modified version of the Segger / Cypress EmFile. In early part of '18 an article appeared Hackser.io with an implementation using Segger libraries by Hima from Cypress allowing SCB (Serial Communication Block) or UDB's (Universal Digital Blocks) for communications to the SD card.
Downloading and compiling the example from Hackster illustrated how easily the project could be changed between SCB or UDB's. Another feature buried in the API's are related SD card functions which are non-blocking. For full details see the Hackster.io site with credit to Hima. Note the Segger library license requirement.
In the capture below, are the two additional directories for adding the SD Card libraries to the MPPT project.
 |
| PSoC4 SD Card Libraries Compiler Entries |
 |
| PSoC4 SD Card Library Linker Entry |
#include <FS.h>
...
...
if ((pFile) && (SD_Removed_Read() == false))
    {
        UARTCrLf[0] = 0x0a;UARTCrLf[0] = 0x0d;

        FS_Write(pFile, PV_string, strlen(PV_string));
        FS_Write(pFile, "," , 1u);
        FS_Write(pFile, BV_string, strlen(BV_string));
        FS_Write(pFile, "," , 1u);
        FS_Write(pFile, BI_string, strlen(BI_string));
        FS_Write(pFile, "," , 1u);
        FS_Write(pFile, TE_string, strlen(TE_string));
        FS_Write(pFile, "," , 1u);
        FS_Write(pFile, LOAD_string, strlen(LOAD_string));
FS_Write(pFile, UARTCrLf , strlen(UARTCrLf));The rather inelegant code above was for testing opening of the log file written to the SD card, by Excel, Libre Office or another similar application with CSV capabilities. Shown below is a sample of the log from the SD card.
0.00V,13.34V,0.00A,25C,OFF
0.14V,13.34V,0.03A,25C,ON
0.14V,13.32V,0.02A,25C,ON
0.14V,13.32V,0.02A,26C,ON
Next up scheduling control of the SD card....

