Thursday 31 December 2015

PSoC to Tracer MPPT 1210RN 2210RN 3215RN 4210RN with Bluetooth and Datalogger

Summary
Although the early EPSolar MPPT Tracer series with remote display have been surpassed by improved MPPT models with inbuilt LCDs, there are plenty of the earlier models that remain in operation. This project is Cypress PSoC 4 BLE based and features connection to the Tracer MPPT, load control, Bluetooth and data logging of the MPPT data.

MPPT
A number of other people have used the EPSolar MT-5 display to reverse engineer the communications protocol, however there was PC software from the same manufacturer which performed all the same functions, possibly more.
EPSolar Tracer RN MPPT
At last glance of the EPSolar website the Tracer series had reached obsolescence and the PC software on the site no longer supports the Tracer series.

Hardware
Initial documentation for the MPPT connections were taken from a site by Steve Pomeroy, another two sites by John Geek. The 8 way RJ connections to the Tracer were drafted with an optional zero ohm link added such that the MPPT could power the project. Buffers were added to the transmit and receive lines, although not a necessity, to ensure some protection for the PSoC from the real world.


EPSolar Tracer RJ45 Connections

For the display an OLED or LCD capable of being powered from 3.3V for both the logic and backlight was selected. In most instances this results in the LCD contrast voltage being negative however this was generated by the PSoC using the circuit shown below.


LCD Connections
LCD Connections
Four momentary push buttons were used instead of the Cypress Capsense feature. This solution using switches was chosen only due to the design of the hardware as the PCB was to be mounted inside a box and away from the lid.


Buttons / User Interface Connections

The power supply regulator was chosen to be small and the usual buck topology. The LMR14203 has been my default single output regulator for some time, certainly there are newer devices with higher efficiency in the low current region of operation. In the event the display that was chosen could not have the backlight operate from 3.3V, a linear 5V regulator was added for testing.


Power Supply Connections

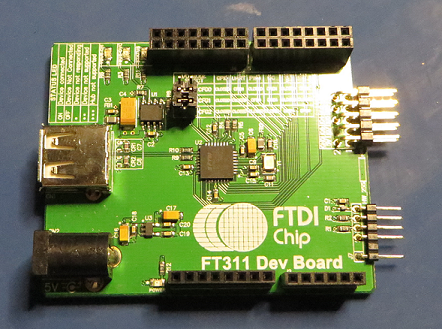
Even though the design incorporated Bluetooth, USB was added for debugging, downloading of data and upgrading of the PSoC. Field upgrades would be possibly by using the PSoC bootloader, a program allowing the active application to be updated some time in the future. The FTDI FT230X was chosen for the USB implementation however for those looking for a similar priced and reliable solution the Cy
press CY7C65213A-32 would also be a good choice.

FTDI USB Connections

The PSoC selected was the CY8C4247LQI-BL483, which features a 48MHz System Clock, 128K FLASH and the all important Bluetooth. Although the PSoC4 libraries did not support SD at the time of writing, there are a few alternatives from the PSoC Community.


PSoC Connections and Supply Filtering
Lastly bringing all the sub-sheets together is the top sheet as shown below.


Project Top Sheet
Project Top Sheet

PCB Enclosure
The PCB was designed to fit into a plastic enclosure with a clear lid, no bells no whistles. A Ritec case from a local supplier was used, the Altronics H0324.


Altronics H0324 enclosure

With the enclosure size selected the PCB dimensions were set to 98mm (W) x 75mm (H).

PCB Design
For the schematic and board design Altium was chosen since the board was mixed logic with RF. This combination was always in my mind a four layer board. The board layer stack would follow the usual two middle power planes and signals on the outside layers.

There were a number of parts added to the component database although none more interesting that the meandered inverted-F antenna (MIFA) to suit the PSoC4 BLE part. The antenna design was well documented in the Cypress Application Note - AN91455. This antenna was implemented as described on Page 10 of the Application Note.


PSoC4 BLE MIFA
PSoC4 BLE MIFA 
The board shape was drawn and a work guide added for the position of the four push buttons, then all components were place on the PCB.

Tracer MPPT Interface Board
With some quick shuffling of parts then an idea of the layout could take place.

Tracer MPPT Interface Board Parts Placement
Parts positions were changed on the PCB with some connectors and the SD card moved to the bottom layer.


Tracer MPPT Interface Board Final Part Placement
A few hours later the final route is shown below.


Tracer MPPT Interface Board Final Route
The board in 3D shows the stacking of the LCD and logic board.

Tracer MPPT Interface Board with LCD
PCB Prototype
The PCB was hand populated for both top and bottom layer. Some last minute modifications were made to the LCD connector and backlight control because the four line LCD had to be changed to another manufacturer. LCD supply pins were swapped.


Top Layer MPPT PCB Populated
Bottom Layer MPPT PCB Populated
To mount the LCD to the MPPT board, a male pin header was soldered to the bottom side of the LCD. To space the LCD and MPPT board 12mm tapped metal spacers were used.


Spacers for MPPT PCB and LCD

USB Check
Two of the hardware connections that were used for debugging this particular project were the Cypress MiniProg3 programmer and the USB port. Certainly the LCD or on-board status LED could also be useful although the background debugger and serial port usually work sufficiently.

With the USB connected between the MPPT board and a Windows PC, the FDTI chip was configured using the FTDI application FT Prog. This application was used to disable three unused CBUS pins and reconfigure the fourth for USB bus voltage detection.


FT Prog Scan
FT Prog Scan
The Scan command was issued the the FTDI device was located.


FT Prog Default CBUS Settings
From the list shown in the Device Tree pictured above, the 'Hardware Specific' item was expanded and the 'CBUS signals' entry was selected.


FT Prog Updated CBUS Settings
The settings were modified as shown above which enabled voltage sensing for the USB - VBUS_Sense. All other CBUS pins were unused and therefore tristated.


FT Prog Program
FT Prog Program
To save the CBUS settings changes using FT Prog, the 'Program' command was used. As shown in the capture above a 'Program Devices' dialog allows for confirmation of the Program process then subsequent programming.


RealTerm Loopback Test for MPPT Board
In order to test the USB a dummy PSoC application was made to loopback the Tx and Rx pins, P0.4 and P0.5 respectively. RealTerm was then used to test the loopback at 921600 - no issues were noted.

Software - Prototype
After the initial hardware checks of the boards power rails some initialisation code was written to check the LCD, buttons and communications. Below is an example of the initialised LCD.


Initialised LCD for Testing

A prototype project, certainly with some bugs, is available for download below.
Prototype Tracer PSoC MPPT Interface
The prototype project implements communications to the Tracer MPPT and display of current MPPT readings to LCD. Some of the current MPPT readings are also sent to the USB port for logging.

Serial Data Logging
The data logging 'USB output' was rather raw code with the sole purpose of providing a console output capable of being imported into Microsoft Excel. The UART Update function was called every minute and send some basic information to a terminal application.

void UART_Update() 
{
    char UART_Buf[20];
    uint16_t UART_temp;

    UART_UartPutString(LINE1_PV);
    UART_temp = MPPTPanelVoltage;                           /* Temp memory to modify for display */
    sprintf(UART_Buf, "%d.%02d%s%c", (UART_temp/100), (UART_temp%100),"V",0x9);
    UART_UartPutString(UART_Buf);
    UART_UartPutString(LINE1_BV);
    UART_temp = MPPTBatVoltage;                             /* Temp memory to modify for display */
    sprintf(UART_Buf, "%d.%02d%2s%c", (UART_temp/100), (UART_temp%100),"V ",0x9);
    UART_UartPutString(UART_Buf);   
    UART_UartPutString(LINE2_BI);  
    UART_temp = MPPTBatteryCurrent;                         /* Temp memory to modify for display */
    sprintf(UART_Buf, "%d.%02d%s%c", (UART_temp/100), (UART_temp%100),"A",0x9);
    UART_UartPutString(UART_Buf);
    if (System.MPPT_Load_Is_On == true)
    {
        UART_UartPutString(" Load On\r\n");
    }
    else if (System.MPPT_Load_Is_On == false)
    {
        UART_UartPutString(" Load Off\r\n");
    }
}

Shown below is an example of the data output to a terminal application.
MPPT Example UART Output
The output panel voltage displayed in the terminal window was also used to verify the position and angle of the solar panel. Moving the solar panel a few degrees off axis to the sun appeared to make no appreciable difference in the readings.

MPPT Protocol
The protocol was verified and confirmed in another of my blogs which can be found at http://electronicmethods.blogspot.com.au/2017/03/tracer-mt-5-to-mppt-communications.html

SD Card
The SD card implementation was scheduled to use the Element 14 community project #50 implementation for the PSoC4, which uses a modified version of the Segger / Cypress EmFile. In early part of '18 an article appeared Hackser.io with an implementation using Segger libraries by Hima from Cypress allowing SCB (Serial Communication Block) or UDB's (Universal Digital Blocks) for communications to the SD card.

Downloading and compiling the example from Hackster illustrated how easily the project could be changed between SCB or UDB's. Another feature buried in the API's are related SD card functions which are non-blocking. For full details see the Hackster.io site with credit to Hima. Note the Segger library license requirement.

In the capture below, are the two additional directories for adding the SD Card libraries to the MPPT project.


PSoC4 SD Card Libraries Compiler Entries
Similarly the Linker references one additional directory.


PSoC4 SD Card Library Linker Entry
To test the SD Card the appropriate File System header file was included and blocking writes were made to the SD card - a snippet is shown below.

#include <FS.h>
...
...
if ((pFile) && (SD_Removed_Read() == false))
    {      
        UARTCrLf[0] = 0x0a;UARTCrLf[0] = 0x0d;

        FS_Write(pFile, PV_string, strlen(PV_string));
        FS_Write(pFile, "," , 1u);
        FS_Write(pFile, BV_string, strlen(BV_string)); 
        FS_Write(pFile, "," , 1u);
        FS_Write(pFile, BI_string, strlen(BI_string)); 
        FS_Write(pFile, "," , 1u);
        FS_Write(pFile, TE_string, strlen(TE_string));
        FS_Write(pFile, "," , 1u);
        FS_Write(pFile, LOAD_string, strlen(LOAD_string));
        FS_Write(pFile, UARTCrLf , strlen(UARTCrLf));
    }

The rather inelegant code above was for testing opening of the log file written to the SD card, by Excel, Libre Office or another similar application with CSV capabilities. Shown below is a sample of the log from the SD card.

0.00V,13.34V,0.00A,25C,OFF
0.14V,13.34V,0.03A,25C,ON 
0.14V,13.32V,0.02A,25C,ON 
0.14V,13.32V,0.02A,26C,ON 

Next up scheduling control of the SD card....

Thursday 5 November 2015

Beta Layout Reflow Controller with USB (FTDI FT311) connection to Android Phone

Summary
As a follow-on from the original Beta Layout post, this information shows one method of connecting the Beta Layout reflow controller serial interface, to an Android compatible phone with some off the shelf hardware.

Reflow Controller
The Beta Layout Reflow Controller (V2) provides a connection to it's inner workings through a serial port (RS232), 9 pin D type connector. While moving a laptop to the reflow controller every time the controller requires and adjustment, there are devices such as the FTDI USB specific hardware to suit interfaces with Android phones.

USB Development Module
One of these devices, FT311, is a plug and play USB Host chip for Android devices. There is an associated development module, UMFT311EV, that provides a number of interfaces, one being RS232. The header pinouts on the module suits off the shelf adaptor boards and some shields.


FTDI FT311 Dev Module

RS232 Adaptor
The FTDI board is TTL so an RS232 shield such as the model from DFRobot can be used to make the required conversion.

DFRobot RS232 Shield

While the 5V and 0V power header is pin compatible between the boards, the communications header with TX, RX, CTS and RTS requires a few jumpers.

Linking Interboard TTL
From Section 4.1.2 of the UMFT311EV datasheet the hardware connections are identified.


UART Hardware Pinouts

Since the hardware handshaking is not used these two pins 5 and 6, can be joined together for now.

DF Robot J1 Pinouts
DF Robot J1 Pinouts

The corresponding Tx and Rx connections as shown on the DF Robot shield schematic, follow the Arduino shield mapping and are available on pins 1 and 2.
To make the modifications, pins 1 and 2 on the Robot shield are snipped off or pulled to the side as not to mate with the FT311 development module.


DF Robot Jumper Connections

Using wire links or a pin header inserted into J1 on the Robot shield, pin 1 RXD is linked to pin 4 or RXD for the USB. Then pin 2 TXD is linked to pin 3 or TXD for the USB. Lastly pins 5 and 6, CTS and RTS are linked.


The FT311 module and Robot shield can be fitted together.

RS232 Cable
Since both the communications devices sport a 9 pin female D connector a null modem cable is required between them.

Hardware Assembly
The other two pieces of hardware required are a power supply or plug pack to suit the development module and the USB charging cable used with the Android phone.


Assembled FT311 and RS232 Shield Hardware

Android Terminal Program
To communicate with the Development board FTDI provide AOA HyperTerm, which is a basic terminal interface for the Android. Available on the Google Play Store and passes the Android MyPermissions and 360 Security checks.

With the HyperTerm application installed and the hardware setup powered then phone can be connected to the charging cable. In doing so the HyperTerm application is automatically launched.


AOA HyperTerm Application from FDTI


To configure the communications select the Settings button then choose the interface required. For the Beta Layout reflow controller, 9600, 8, N, 1 are the communications settings and since the hardware handshaking is looped at the DF Robot shield, the default settings in HyperTerm can be used.


AOA HyperTerm Communications Settings

After selecting Configure commands can be exchanged with the reflow controller.

AOA HyperTerm Communications Settings Confirmation

Starting with sending help and a CR the list of available commands is returned.

Beta Layout commands on AOA HyperTerm

In the screenshot above the help screen and status data is displayed in the HyperTerm window. The status information is configured for bursts at five second intervals which is used to track the starting and operational temperatures.

The final setup of the hardware as used on the bench is shown below. For similar and compatible Android USB hosts, shields or development kits the same process should be possible!

Beta Layout, USB Dev Kit, RS232 Shield with Android and AOA HyperTerm

Sunday 18 October 2015

Beta Layout Reflow Controller with Sunbeam BT2600 Mini Bake and Grill for Reflow Soldering

Summary
While designing a prototype circuit for an LED torch it became apparent that many of the white LED controllers were surface mount leadless devices. Many of these devices have exposed pads meaning that standard soldering with an iron can be difficult.

It is possible to solder smaller devices with exposed pads by directly applying the heat beneath the device through thermal vias in the PCB, or use the oven in the household kitchen to reflow, however neither of these are ideal solutions.

Reflow Controller
Beta Layout have for some time sold a Reflow Controller. This controller (Version2) has been reviewed with the Severin oven which Beta Layout provides however there are no reviews for ovens available locally in Australia. 


Beta Layout V2 Reflow Controller

At the time of writing the Beta Layout controller sold for €119 plus shipping. There are a number of kits and Arduino style solutions on the web although for an off the shelf solution this was worth trying the controller with a locally available oven to determine suitability for home reflow soldering.


Reflow Oven
The only factor determining the oven to choose was the maximum load of the reflow controller which, for the version two model, is 1500W.

Searching the local market results in a grill from Sunbeam BT2600 with elements top and bottom. The oven retails from the GoodGuys for just under $60 AUD.


Sunbeam BT2600 Oven
Sunbeam BT2600 Oven

Noteworthy Items
It should be noted that as the controller is European made the associated mains plug and socket suit the European market. No option to order an Australian plug to female IEC plug or male IEC to Australian socket.

Oven and Reflow Controller Learn Cycle
Beta Layout's controller is for the most part plug and go. On the hardware side there is the main AC power, oven AC power and the thermocouple. 

A learning cycle must be completed before the controller can be used. The thermocouple can readily be lashed to a dummy PCB (spare leaded components or enamelled copper wire) and placed in the most central position inside the oven.


Sunbeam BT2600 Oven Inside

With the door down the upper and lower heating elements are easily visible. On the front control panel the oven is switched to 240C and the timer set to OFF.

The dummy PCB is placed in the middle of the oven, door closed, power ON and the learning process is ready to start.

Test PCB for Learning Cycle

Once the learning button is pressed the oven comes to the required temperature and then the oven switches off. Subsequently it should be noted that the oven was left running standalone, in the garage, for an additional 10 min to reduce some of the VOCs. Time for a test board.

Test Board and Oven Temperature Profile
For the reflow tests the same PCB is used. A few resistor pad pairs are cleaned with flux, solder paste added and surface mount resistors applied. To apply the solder paste without a stencil, a syringe with a 0.5mm needle allows a relatively clean and controlled application of the paste.

With the PCB placed in the middle of the oven, the door is closed and the solder button is pressed on the controller. The thermocouple was left attached to the test PCB.

Beta Layout Controller - Preheat Stage

Several minutes later the reflow process has completed and the oven has cooled down sufficiently that the PCB can be checked.

Test PCB after Reflow

Inspecting the PCB, all joints to the resistors are clean and the component alignment is good - not faultless. Changes to the profile may help eliminate some bubbling on the joints.

Before operating the oven again the RS232 port on the controller is connected to a laptop and a standard terminal program, TeraTerm. Using the controllers interface the automatic temperature measurements were configured to be output at 5 second intervals. A number of cycles were run across the day as the ambient temperature increased.

Below are the graphed profiles of the oven with some minor variation in the starting ambient temperature.

Reflow Oven Temperature Profile

Several subsequent tests using the oven yielded repeatable reflow results with similar sized PCB's. Reducing the oven thermostat from 240C to 210C made little difference to the results however reducing the thermostat to 190C caused issues with proper wetting and should be avoided.

Shortly after the reflow cycle was complete the door of the oven was opened and a thermal image taken. Some of the heat has already escaped from the opening of the door.

BT2600 thermal image shortly after reflow

The temperature profile used by the controller can be manually configured through the serial interface using a terminal program. 

In summary this combination of controller and oven is a valuable addition to the prototyping hardware setup which can yield excellent results for the home hobbyist.

Friday 4 September 2015

Wireless remote controlled rocket launcher with Atmel ATMega328 for Arduino - Version 2

Summary
This is the second version of the Rocket Launcher project. This includes improvements for safety, a microcontroller upgrade and additional features. With the maker community now so large this design will be based on the Arduino with custom hardware.


Improvement Summary
To improve the launcher design some items were considered.
  1. Reverse Battery Protection
    P
    revent false launches when a engine is fitted and the battery is wired in reverse
  2. Igniter Connected
    L
    oad (igniter) sense addition to show if the igniter is still connected
  3. Low Battery A defined threshold and indicator showing the low battery condition
  4. Alternative Transmitter and ReceiverAllow an alternative to the communications hardware
  5. Improve User InterfaceAllow for interfacing to an LCD to provide more information and control
  6. Upgraded MicroLarger microcontroller for the additional features listed above
Change Summary
Starting with the new Atmel microcontroller each of the improvements will be reviewed.
  1. MicrocontrollerThe Atmel ATMega328P is featured prominently in Arduino designs and is a well established micro. This device lacks some of the features newer devices offer such USB interfacing on the 32U4, however it is also half the price
    ATMega328P (TQFP Footprint)
    ATMega328P (TQFP Footprint)
  2. Reverse Battery ProtectionA high current diode with a low forward voltage (Schottky) added to the circuit to prevent reverse battery issues
  3. Igniter Active
    Detection of the battery voltage on the the MOSFET drain to indicate that an igniter is connected, analog to digital (AD) conversion
  4. User InterfaceLCD header integrated into the next circuit board with buttons for control and feedback
  5. Alternative Transmitter and Receiver
    Multiple footprints for receiver hardware on the circuit board
  6. Low Battery
    The Sealed Lead Acid (SLA) battery will be monitored with a Zener diode dropper with a resistor divider
  7. Data Logging
    With all the new metrics being gathered it makes sense to add an SD card
Design Notes
Aside from the new micro some additional buffering will be added to protect against ESD and other forms of damage.

Part Selection
Up next the alternative transmitter and receiver, then handling the level translation for the SD card... 

Saturday 8 August 2015

Arlec 19 LED Lantern Torch upgrade with brighter LED's (45 lumen)

Summary
This blog illustrates one possible upgrade to the Arlec 19 LED lantern torch with the aim of upgrading the LED's, using a white LED driver to make the light output more consistent as the battery voltage decreases and extracting more life from the 6V lantern battery if possible.


Arlec LED Torch
Arlec LED Torch

Sections in this blog:
  1. Reason For Upgrade
  2. Lantern Battery
  3. LED Circuit
  4. Benchmark
  5. Upgrading The Design
  6. Selecting New Components
  7. Schematic Design
  8. PCB Design
  9. Populated PCB
  10. Comparison New and Old
  11. Downloads

Reason For Upgrade
There is a noticeable difference in the light intensity between this Arlec model and my older single bulb style Eveready Dolphin. The LED torch does the job for illuminating items close up, certainly no complaints there. When the Arlec was initially purchased the light output was more than acceptable with the 6V battery giving it's all. After sporadic use over a few months the light intensity simply dropped off. Time to investigate why and if this can be remedied.


Lantern Battery
When the torch was purchased it is supplied with an Arlec 6V Lantern Battery. The Arlec battery follows the standard 6V 11Ah design and is comprised internally of 4 separate F size batteries. The Eveready Super Heavy Duty 6V Lantern battery datasheet can be used as a comparison as Arlec don't appear to publish a datasheet.


Eveready Super Heavy Duty 6V Lantern Battery Discharge Curve

Assuming a total LED current of 100mA and a constant current discharge, by using the discharge curve for a 3V cut off the torch will operate for almost 100 hours. This does not match up to the tens of hours the torch actually lasted for.

Over the expected 100 hours of operation, including self-discharge, the battery voltage will gradually decrease, meaning that depending on the circuit design the life of the torch will be somewhat less. To determine how much less it's time to look at the existing circuit and the battery together.


Battery Open Circuit Voltages
Firstly is the battery itself. This is comprised of four series F size batteries which can be considered flat at 0.8V under load (industry standard). This gives a terminal voltage of 3.2V.

For a known flat 6V lantern battery the unloaded terminal voltage is 5.67V. Looks great unloaded right. Connecting the LED circuit board the battery terminal voltage drops of 2.55V almost immediately then continues to drop at a rate of 0.1V every five or so seconds, this is too flat to be useable. Again removing the load and the battery recovers to 5.5V.

LED Circuit
The LED's themselves, the current driven through the LED and importantly the forward voltage drop of the LED itself.

Unscrewing the torch allows the back of the circuit board to be seen. The circuit board, shown below, can be removed from the front housing by unscrewing four screws.

From a quick visual inspection there appears to be two LED strings across the battery (after the ON switch). Two 33R resistors limit the current to two separate LED strings, one with 9 LED's and the other with 10 LED's. For each string of LED's all devices are connected in parallel.


Arlec LED Torch PCB
Arlec LED Torch PCB


Benchmark
To gather some metrics the LED board was powered from a benchtop power supply.

With a 6V output from the power supply the terminal voltage at the rear of the circuit board was 5.975V.

Arlec Active LED Torch PCB
Active LED Torch PCB

The power supply displayed 0.193A and the first string with 9 LED's in parallel had 2.86V forward voltage the second string with 10 LED's had a forward voltage of 2.83V.
Arlec PCB on Power supply

When the power supply voltage is slowly reduced from 6V the light intensity appears just useable to 4.5V however reduced further to 3.5V this barely lights a small room.

Upgrading The Design
There are a few upgrades that can be made to the design.
  1. LED Driver: For the battery voltage between 4.5V and the discharged battery voltage of 3.2V there is some capacity left in the cells.
    In order to use this capacity the LED's must be driven in a different manner that is not using resistors, or at least resistors that are very small in value or keep losses to a minimum.

    One of the common methods for driving white LED's is by using a constant current source. There are a number of benefits by using a constant current design of which a relatively constant drive to the LED's can produce a more consistent light output over the range of the battery voltage when compared to using simply resistors.
  2. LED Type: In the discrete LED market the big player names of CREE and Nichia will sound familiar to those in the field. There are other tier LED manufacturers such as Optek, Line-On and Everlight to name a few.
    Certainly it would be surprising if the LED's used for the torch were CREE. Regardless it does not hurt to look for an LED with a better specification.
  3. LED Viewing Angle: Be it from me to suggest that a torch should resemble a spotlight in light pattern, on the other hand why waste light on objects you are not looking at. To that effect, selecting an LED with a narrow viewing angle of 15 degrees will be more effective as a torch instead of using an LED with a 120 degree viewing angle.
  4. Other Smarts: There are other designs online for torch retrofits with LED's with pulse width modulation, low battery cut out or using a single higher power LED device.
    Although pulsed LED's do have a higher efficiency when used with higher currents the low steady current used by torch would negate this gain. Again testing is the best way to validate this so a separate adjustable timer can be added to the design.
Selecting New Components
The constant current design for the LED's could be achieved with some discrete components and to solve the LED drive issue when the battery voltage drops, a boost converter can be used. This comes at a cost to the remaining battery capacity and no boost converter is perfect in the conversion.

Rather than build this design using discrete components a dedicated LED driver with a boost converter can be used with a handful of external parts. Chip manufacturers such as Texas Instruments (TI), Linear Technology and Micrel all have ready to solder solutions which will suit this application.


LED Driver
To select the new LED driver from the hundreds of devices found on Digikey, Mouser, Element14, RS Components and more it pays to detail a list of requirements which can be used to focus the search.
For this design the driver should have: 

  1. Input voltage range of 3V to 7V
  2. Capacity to drive a number of white LED's in series (string). This relates to the output voltage that can be generated by the boost converter
  3. Switching current to drive a number of strings, 3 in this design, at a current of 20mA per string
  4. Price, current consumption of the actual LED driver and flatness of the LED driver efficiency against the actual battery voltage are other factors to also keep in mind
EDIT
The TPS61160 was initially selected and tested, however due to the LED string design in this circuit, the operation was unstable. A more expensive device was chosen which was the LT1618EMS. Essentially the white LED driver design shown in the datasheet was used with a change to the 2.49R resistor used for current limiting.


LT1618 Datasheet Circuit Example (Courtesy Linear Technology)

White LED
Sorting through supplier's websites, component suppliers and blogs can be somewhat daunting. One novel site that summarised the essentials of LED's can be found on Gizmology
The Gizmology website contains a section on luminous intensity, which is the standard measurement for low power discrete LED's, and the conversion to luminous flux which was one of the factors used to select a replacement LED for this design.

Below is a sample of some of the comparisons made:
  1. Everlight, Part# 334-15/F1C2-1VWA, Angle 20 degrees, 14625mcd typical
  2. Cree, Part# C512A-WNN-CZ0B0151, Angle 25 degrees, 15850mcd typical
  3. Marl (Nichia), Part# NSPW500DS, Angle 20 degrees, 27000mcd typical
  4. Cree, Part# C503D-WAN-CCBEB151, Angle 15 degrees, 35000mcd typical
Glancing at the list item 4, Cree C503D, looks like the device to choose surely. However using an online calculator the luminous flux was calculated for beam angles giving a different result:
  1. Everlight, Angle 20 degrees, 14625mcd, 1.396 lumen
  2. Cree, Angle 25 degrees, 15850mcd, 2.360 lumen
  3. Marl, Angle 20 degrees, 27000mcd, 2.577 lumen
  4. Cree, Angle 15 degrees, 35000mcd, 1.88 lumen
No surprise that the Marl device, which was also the most expensive by 7 times compared to its closest rival, also has the highest luminous flux.

Now a twist in the selection criteria was the ranking or binning system used by most LED manufacturers. This sorts LED's by a number of physical characteristics. For the Marl (Nichia) device, which appeared to be a V ranked part, the minimum luminous intensity shows 22000mcd and maximum 31000mcd.

Listing the minimum luminous intensity and corresponding flux:

  1. Everlight, Angle 20 degrees, 11250mcd min, 1.074 lumen
  2. Cree, Angle 25 degrees, 8200mcd min, 1.221 lumen
  3. Marl, Angle 20 degrees, 22000mcd min, 2.099 lumen
  4. Cree, Angle 15 degrees, 16800mcd min, 0.903 lumen

For the limited budget of one dollar, the CREE C512A series was a cost effective option. Plenty of surface mount white LED's would outperform this thru hole LED. The usage of surface mount is a different circuit board technology (Al-Core).

The C512A CREE LED had a standard 3.2V forward voltage at a current of 20mA. Instead of retaining the 19 LED design the number of LED's was reduced to a even 18 such that split strings were able to be used. With these details the boost converter components were calculated.


Schematic Design
Added to the white LED driver design in an optional PWM circuit. It could be interesting to map out LED brightness against continuous current.


Updated LED Circuit with LT1618

A low power 555 timer is wired in an astable configuration with some additional diodes to give a wider control over the PWM operational range. Either a pot or resistor is fitted between the discharge and trigger pins allowing the PWM to be manually adjusted or permanently set.


PCB Design
Before beginning the PCB layout the size of the board, mounting holes and LED positions are measured from the existing Arlec design.


PCB Mechanical Properties

The four mounting holes were measured, albeit rather crudely with a steel ruler and the corresponding middle LED position used to determine a radius for the outer two rings of LED's. On the PCB this detail was added to one of the mechanical layers. Individual LED positions were added as small crosses to aid in component placement.

Next the bulb connection is added and LED's which are placed at a 45 degree angles to simplify the routing.

PCB LED Placement
PCB LED Placement

A top layer fill was added to provide mechanical stability and routing for the LED driver.


PCB Top Layer Route
PCB Top Layer Route

PCB Bottom Layer Route


Shown below is the board viewed from the front in 3D.

PCB 3D Front View
PCB 3D Front View

The rear of the PCB fully loaded with the white LED controller, optional timer and bulb mount to suit the existing torch hardware. There is a single wire connection from the tip of the bulb to a through hole pad connection on the board.

PCB Final Route in 3D

After a final component placement, board clearance and PCB design rule check the PCB is sent off to 3PCB for manufacture.

Populated PCB
Below is the populated PCB mounted on the reflector.


Populated PCB Front View (mounted on reflector)


Populated PCB Rear View (mounted on reflector)

Comparison New and Old
Without having a Lux meter to compare, both boards were directed at a wall with a 1m between the boards, 1m away from the wall, with no other light sources. The reflector was not fitted to either board and the result is easily visible.

Comparison Improved and Original Boards (without reflector)

Fittingly the new board also draws less current at 6V, 160mA compared to the older board drawing 195mA. This is a saving of almost 18% although as the battery voltage drops the current drawn by the LED driver continues to increase.


Comparison Original and Improved Boards (current consumption)

The LED driver will run down to 2.6V on the bench power supply while drawing 700mA although at this time the lantern battery is probably well and truly dead!

Downloads
Schematic Rev D
Altium PCB File
Top Layer as DXF
Bottom Layer as DXF